ACL (Access Control List) screens are intended to define to which configuration screen a user will have access. Based on the user's role, the admin user can select which actions the end user will be permitted to perform.
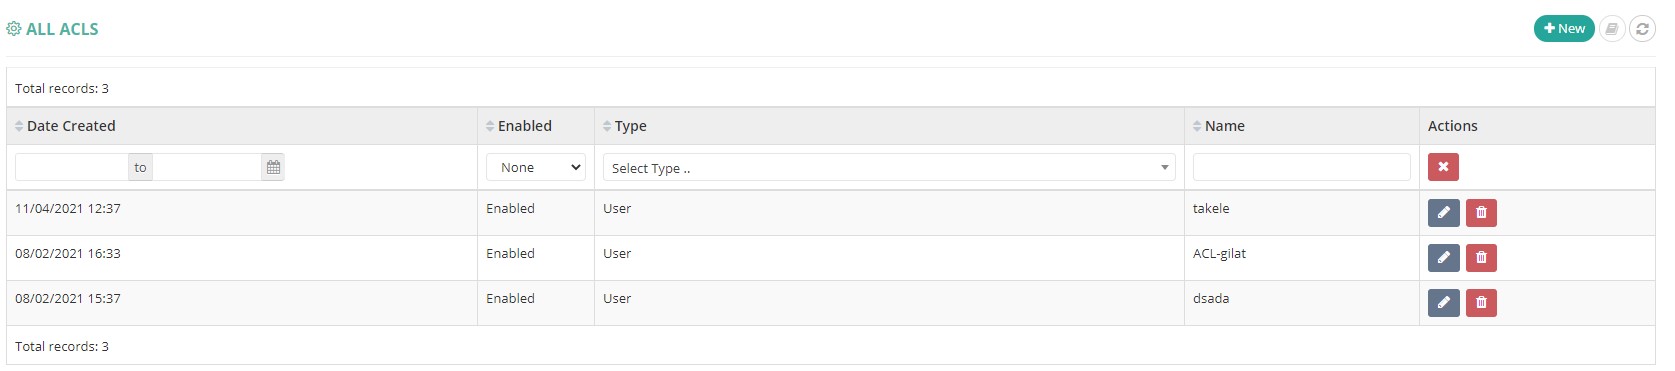
In this table all of the ACLs defined and assigned to the current Admin-user will be listed.
Note an ACL is valid for any environment that belong to the current admin-user and may be used in different environments and users at the same time.
1. Table Columns:
- Date when the ACL was created
- ACL Enabled/Disabled
- Type of ACL (usually "user").
- Name of the ACL (preferably use a meaningful name that will include the permissions.)
- The last column will be actions you can use to manage/edit the ACL
2. On the top-right corner the “+New” icon is used to create new ACL. Also the "refresh" icon will reload the table.
3. Actions -
Clicking on the pencil icon ->>> will open the editing page for the ACL.
Clicking on the bin icon ->>> will delete the ACL.
Clicking on the mail icon ->>> will open the screen for all voicemails received.
Clicking on the “+New” button will refer you to the page where you can create a new ACL

Note that new and edit are very similar.
Fields:
- UUID (New screen only, read only) - A universally unique identifier (UUID) of the ACL
- Enabled - yes if checkbox is ticked
- Name – the name of the ACL. Since an ACL can be shred by 1 or more users from different environments, it should be assigned a meaningful name.
- Type - select "user". "sip provider" is covered by advanced topics.
- Permissions - see below
- Notes:
After you are done creating the ACL and selecting/deselecting the permissions, click the "Save" button to save it.

Comments
0 comments
Please sign in to leave a comment.