
-
Accounts Screen
An “Account” is used to add a user and his/her role in the Voipappz System . This user, according to their assigned role, can manage the technical Aspects for Environments assigned to them. The assigned account user will have ability to grant other users certain permissions, such as the option to limit each user’s access to certain screens or environments , to manage extensions, SIPs and to create and generate reports.
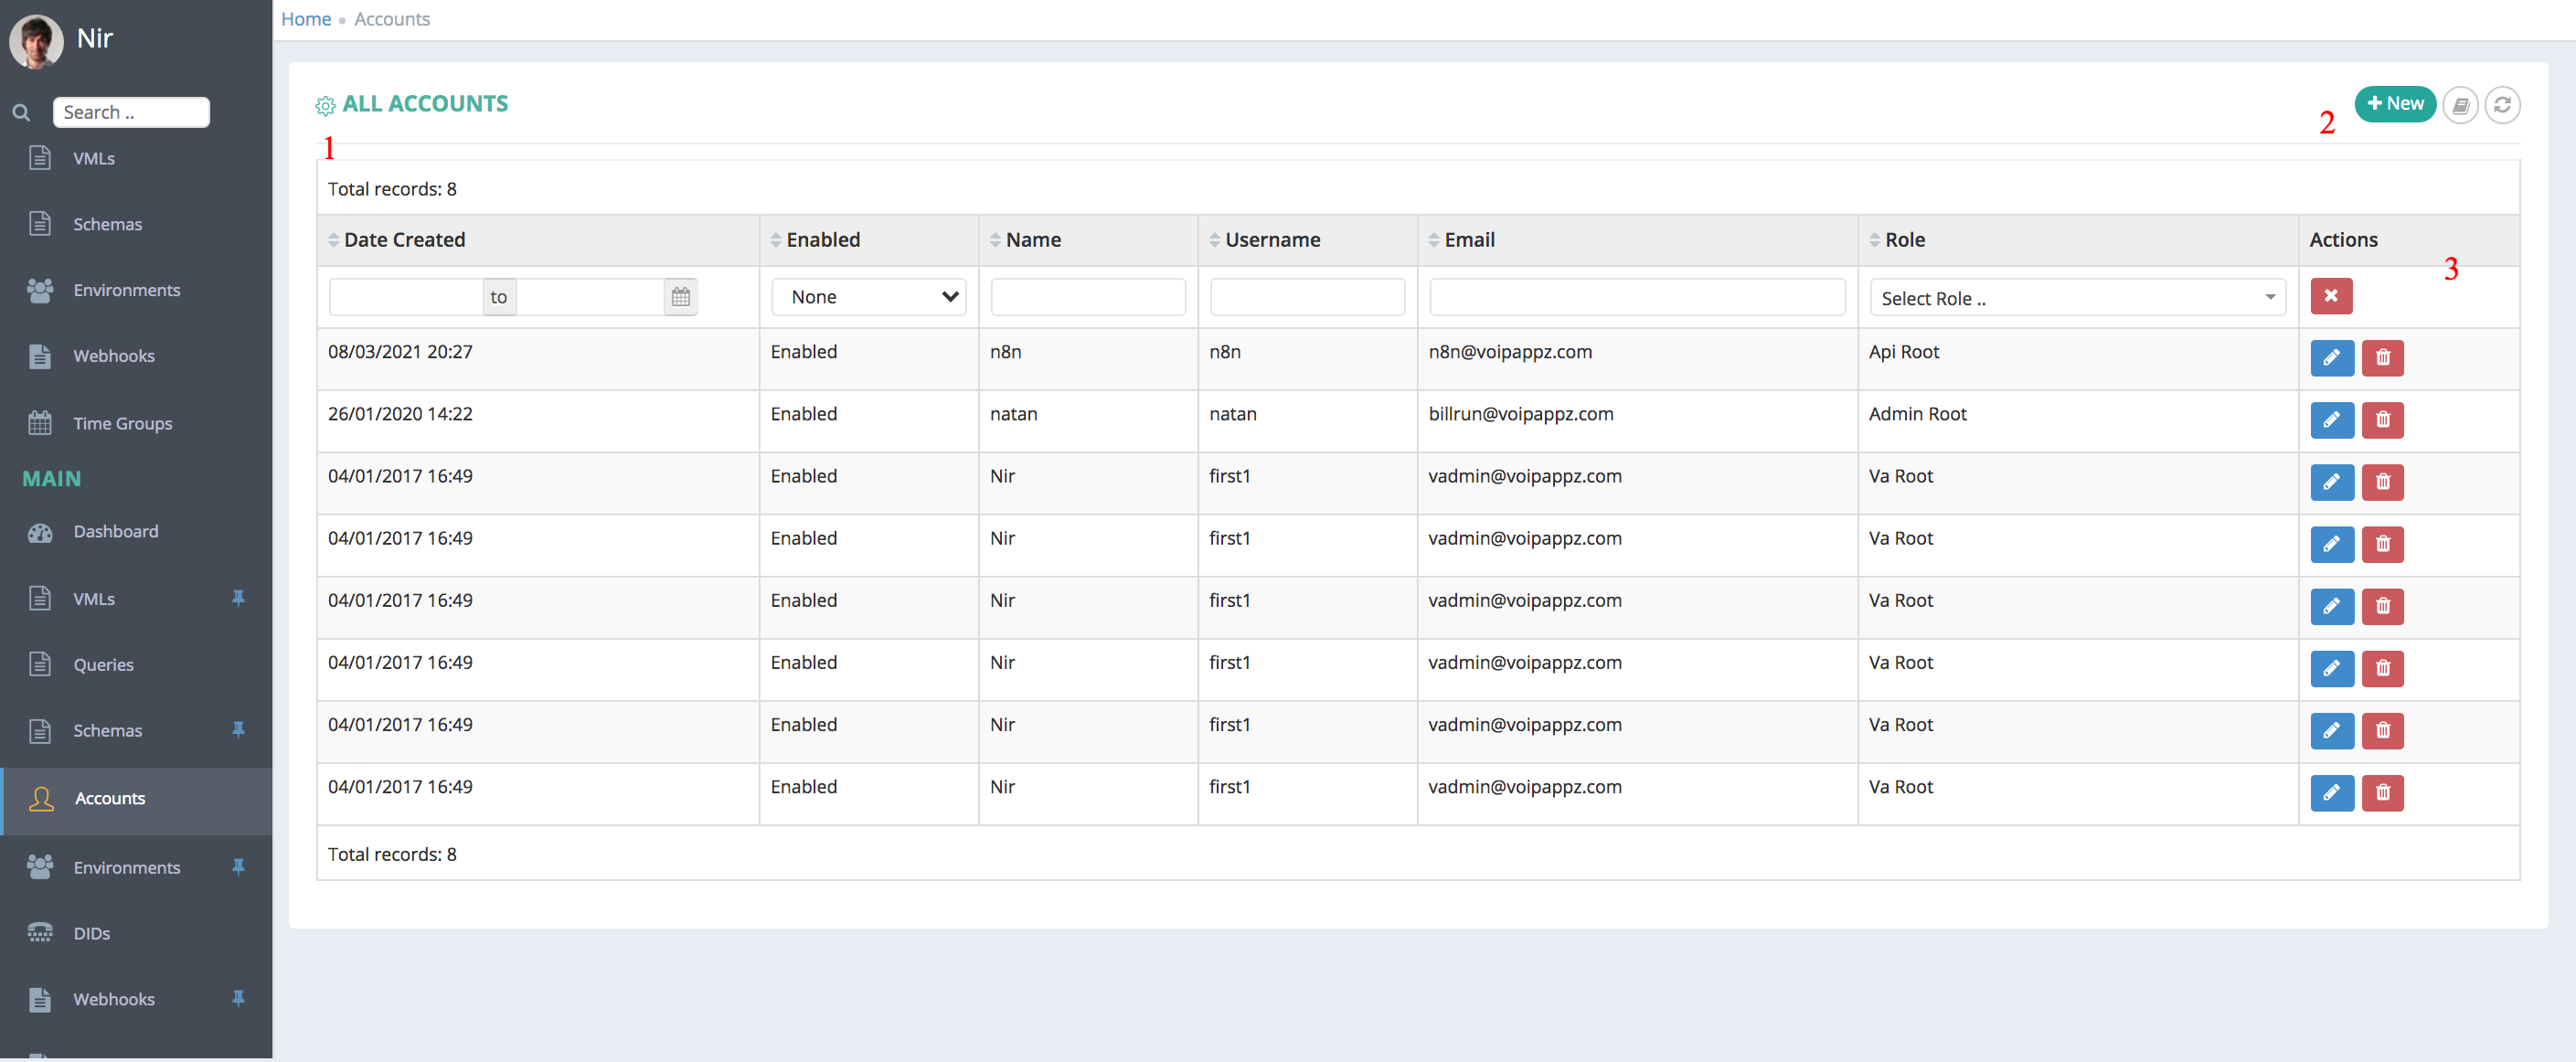
List Accounts:
In this table all of the user-accounts that belong to the current admin-user are listed.
1. Table Columns:
- Date when the Account were created,
- if it’s enabled or not,
- name and username,
- role
- The last column will be actions you can use to manage/edit the user-account,
Clicking on the pencil icon ->>> will open the editing page for this user-account.
Clicking on the bin icon ->>> will delete the user-account.
2. On the top-right corner the “+New” icon is used to create new user-account.
3. The "refresh" icon will reload the table.
4. Edit Current Account -
Clicking on the pencil icon ->>> will open the editing page for this user-account.
Clicking on the bin icon ->>> will delete the user-account.
Create New Account
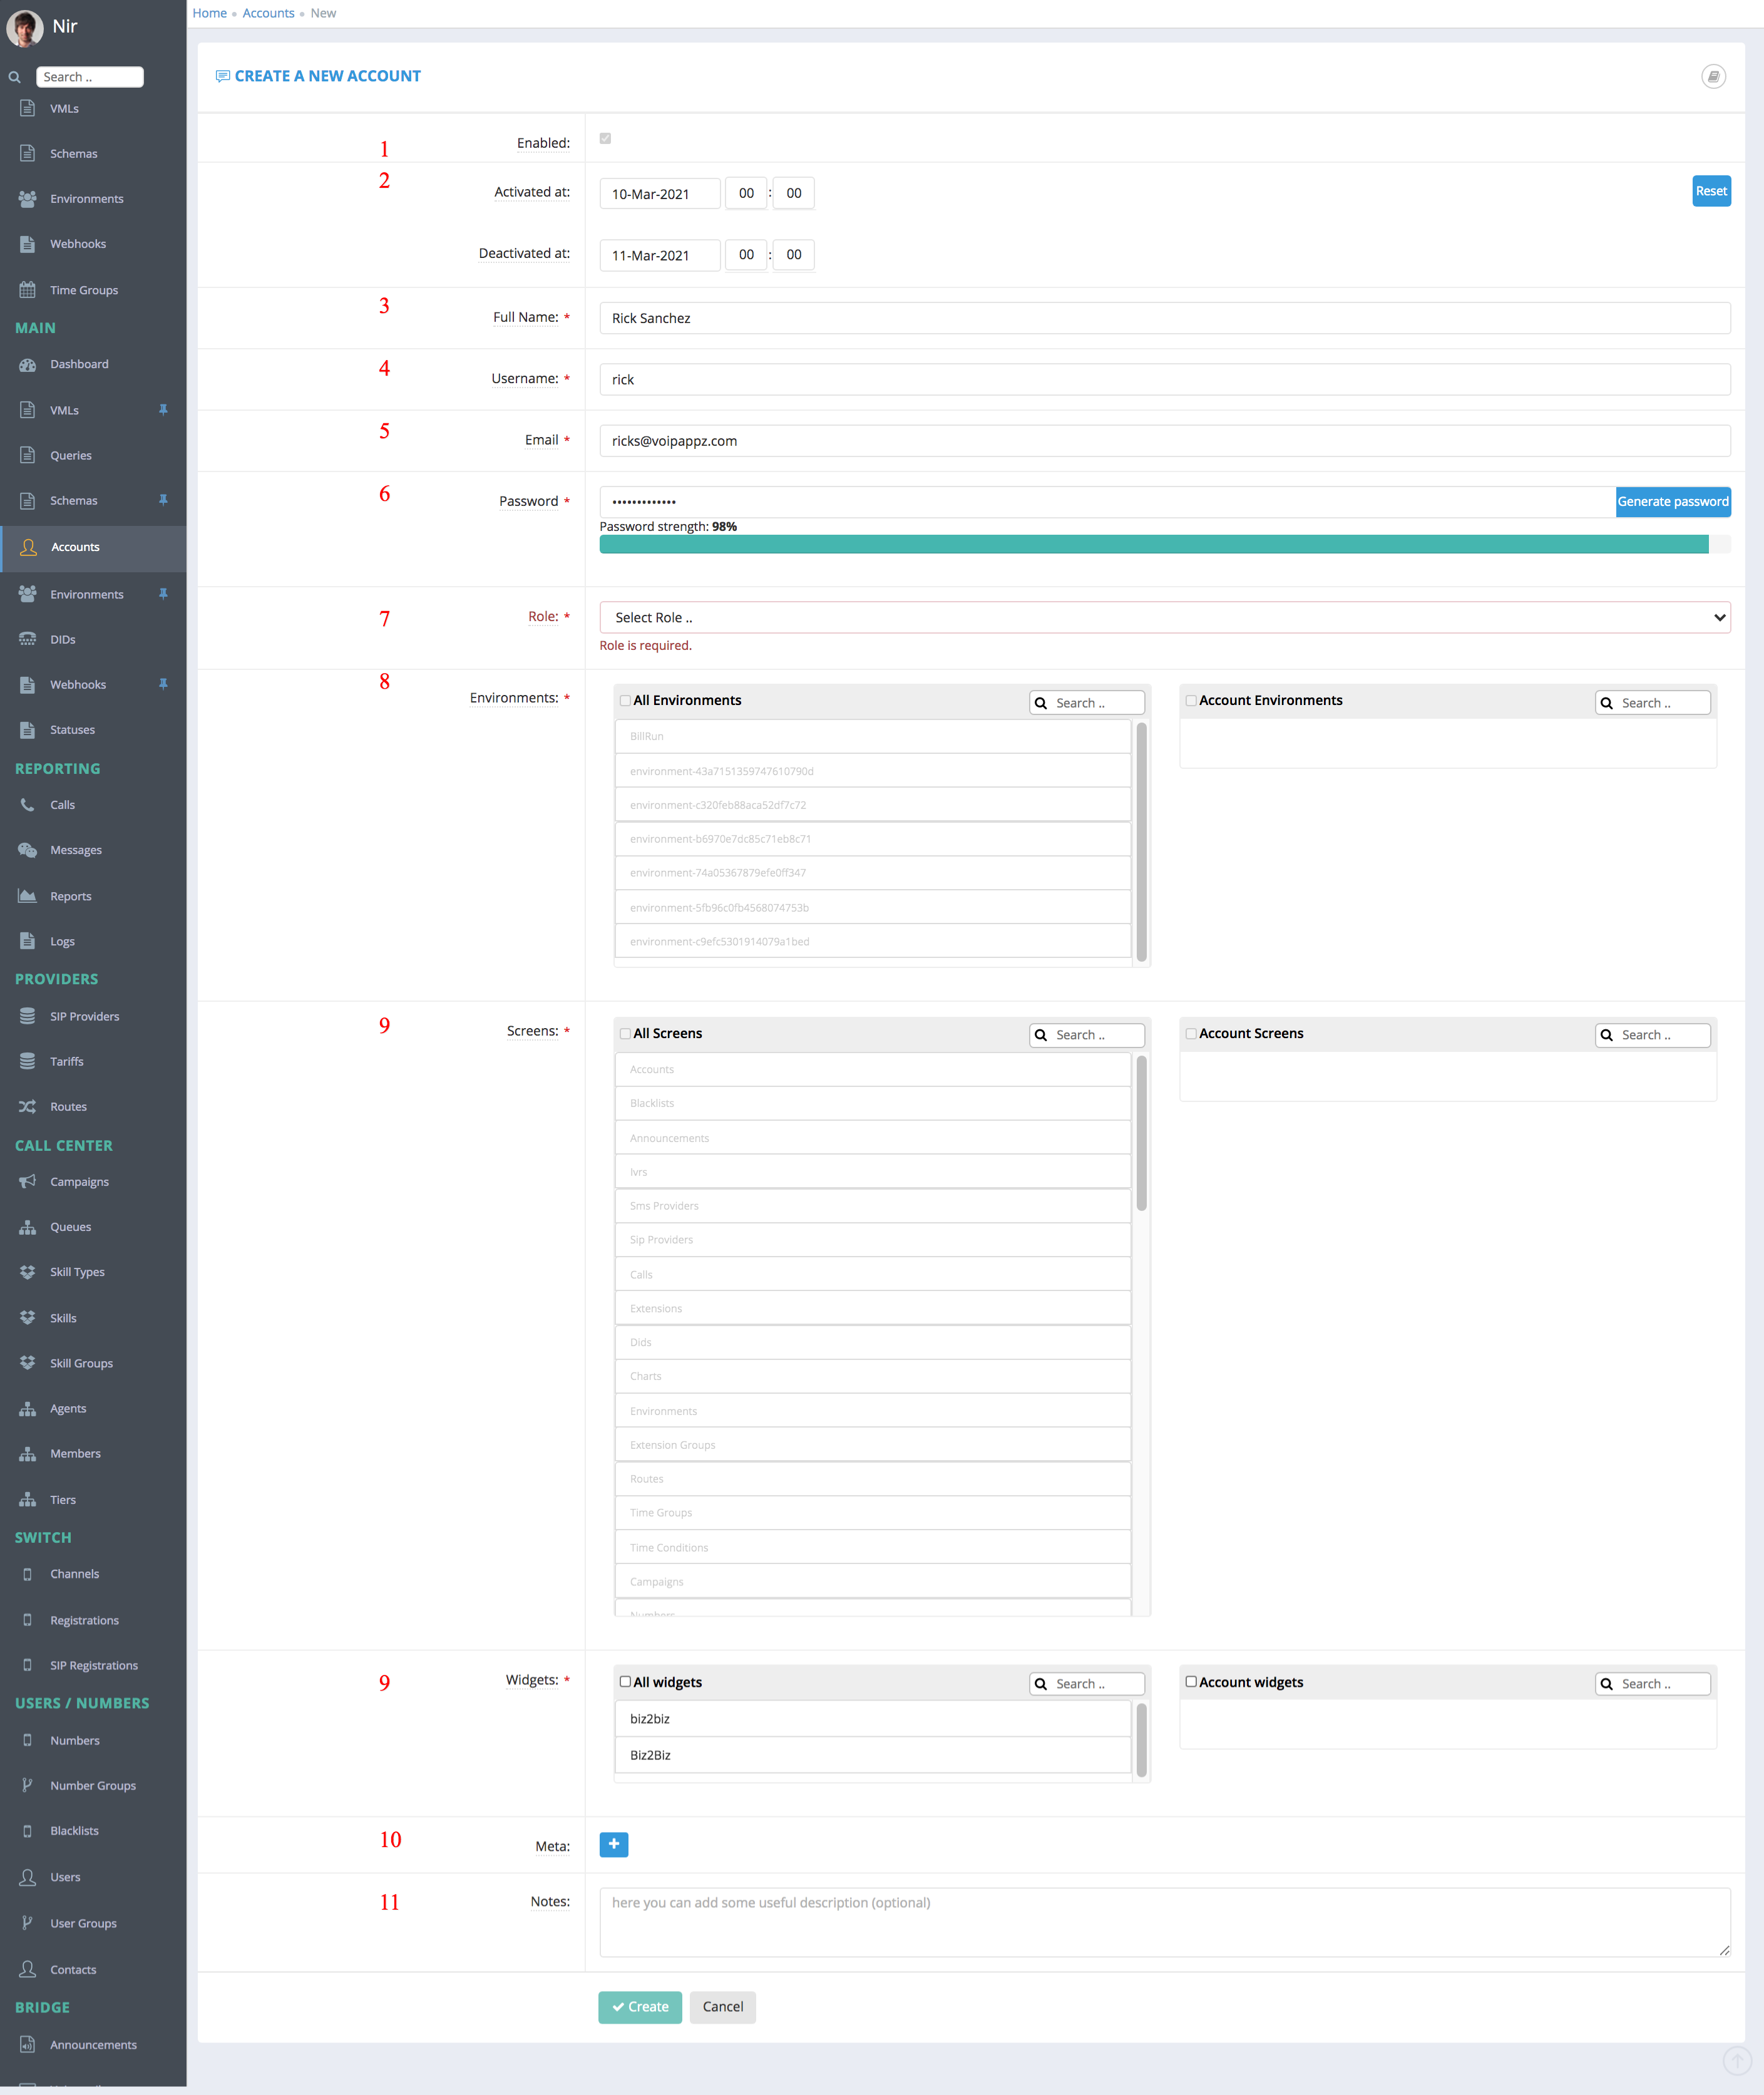
Clicking on the “+New” button will refer you to the page where you can create a new user-account.
Basics:
In this section the you (the Admin) will define:
- Enabled - Always true
- Activated at Time Frame for the new Account will be enabled (This is good for demo purposes)
- The Full Name of the Account (for identification)
- Username
- Password (Highly recommended to use the ‘generate password’ button)
- Role - you Can Choose from the following Roles
- api
- api_root
- admin_write
- admin_read
- admin_root
- Environment - Select which environment will be visible for the Account
- Screens - Select which Screens will be visible for the Account
- Meta - Set Custom Meta Fields for the Account
- Notes - Notes - free text for reference.
After you are done creating the Environment click the "Save" button to save it.
Notes:
- Editing an Account is similar to creating new Account, the same fields are there and you can edit them as required. Click the "save" button for the changes to take effect.
- The "Notes box" at the bottom is open text box were you could write anything you think will help you regarding the current Environment.
- Changing the Account Name is not recommended since it is used throughout the system.
Comments
0 comments
Article is closed for comments.